How to setup your QNAP NAS with Apple Time Machine
Using your NAS as an archive for Time Machine is fairly easy, although it requires a little fiddling in the Terminal.
You can find the pdf contributed by a QNAP forum user - sodium. here based on the ideas from stevebow
Disclaimer: QNAP is not responsible for any loss of data and/or functionality of your Mac and/or QNAP machine. !
Requirements
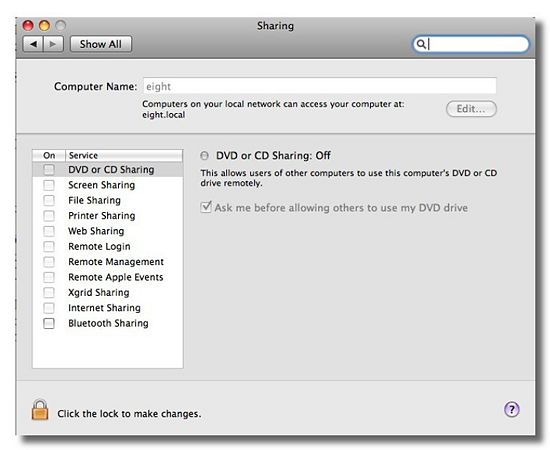
- MacBook Pro running OSX 10.5.6 (length of the hostname should be kept wintin eight characters) *1*
- QNAP NAS running firmware 2.1.5 build 0408T (AFP sharing)
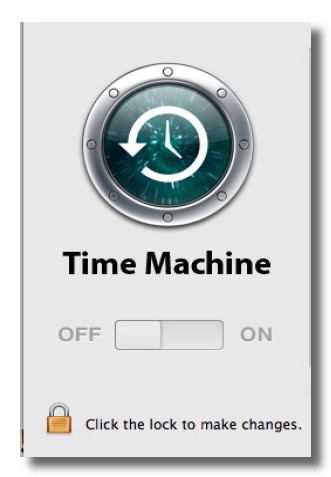
- Turn TimeMachine off at this point in the System Preferences (if already disabled skip this step) If you see a closed lock at the bottom of the page click the lock and type you password (assuming you have admin rights) to unlock the preferences pane.
*1*: if you changed the hostname of your system, a reboot is mandatory before you go on with this manual!
Setup TimeMachine on your QNAP NAS
1. Open the Terminal application (⌘+space to open Spotlight (or click op the magnifying glass in the upper right corner) and type Terminal) For those new to this funny blinking cursor do not be afraid :-) You'll see something like this:
Last login: Thu Apr 23 15:34:14 on ttys001 eight:~ $
2. (Mac OS 10.8 does not require this. Directory naming has different style and TimeMachine can create the sparse file automatically.) Create a special file which will be used by TimeMachine called a sparsebundle (virtual filesystem image) !!! This sparsebundle will not fill your HDD instantly the virtual filesystem will be created empty :-)
cut and paste the following whole line into the Terminal application
HN=`hostname | cut -f1 -d.`;MA=`ifconfig en0 | egrep ether | sed "s|:||g" | cut -f2 -d' '`;hdiutil create -size 350g -fs HFS+J -volname "TM_$HN" $HN\_$MA.sparsebundle
and you will see something like:
created: /Users/sodium/eight_002332123456.sparsebundle
- FIXME ***
In my case I made the file as big as my internal HDD (350 Gbyte). !!! Keep in mind my system name is eight, my mac address = 002332123456, and my VolumeLabel = TM_eight these variables will be different on your system !!!
There should be an addition to explain th quota-setup withi the nas for the specific user.
To make sure that timemachine doesn't "eat up" your entire diskspace we set a quota, which limits the total amount of space timemachine may use at any time. Whenever the quota is reached, in order to store the newest changes, timemachine will remove old files from your backup . So in order to have a backup of a your entire system, you at least want to set it to the size of your harddisk (or it would start erasing "old" files before you actually have a full system backup). You can also make it further, in which case you will be able to "travel" further back in time.
Similarly, inside your nas under user management, you can also set a quota to limit the amount of space a user is allowed to use on the QNap device. You will want to set this at least as big as the size of the quota of the Timemachine backup (and probably bigger so the user can store more files). Alternatively, you can disable it.
if at the end of step 2 you do not see the message that the sparsebundle was created do the following: (break the big command into smaller pieces)
HN=`hostname | cut -f1 -d.`
echo $HN
eight
MA=`ifconfig en0 | egrep ether | sed "s|:||g" | cut -f2 -d' '`
echo $MA
002332123456
Try the creation again:
hdiutil create -size 350g -fs HFS+J -volname "TM_$HN" $HN\_$MA.sparsebundle
created: /Users/sodium/eight_002332123456.sparsebundle
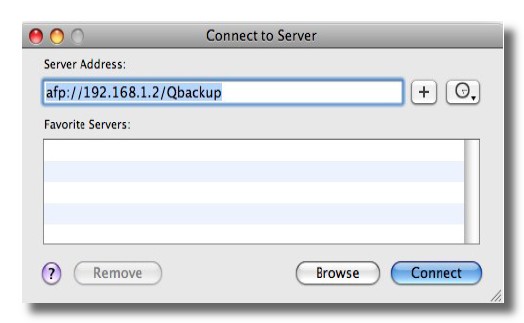
3. Mount the destination (in my case Qbackup) via AFP click on finder and press ⌘+k (connect to server)

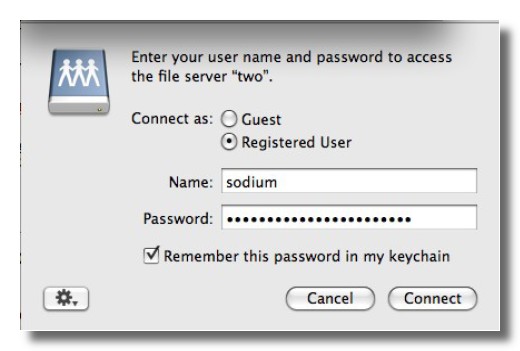
4. Copy the sparsebundle to the volume by typing the following in the Terminal screen:
$ rsync -avE eight_002332123456.sparsebundle /Volumes/Qbackup/
This will not take long as the created sparsebundle is only about 60 Mbyte (for a sparsebundle of 350Gbyte)
After some seconds you'll get the prompt back.
5. Tidy up your HDD of delete it using finder.
$ rm -rf /Users/sodium/eight_002332123456.sparsebundle
6. (Modern QNAP firmware, eg. 3.8.0+ have netatalk 2.2.0+ which does support AFP's DHX2 and Lock Stealing. This is not needed anymore.) Enable non-TimeCapsule disks for TimeMachine.
$ defaults write com.apple.systempreferences TMShowUnsupportedNetworkVolumes 1
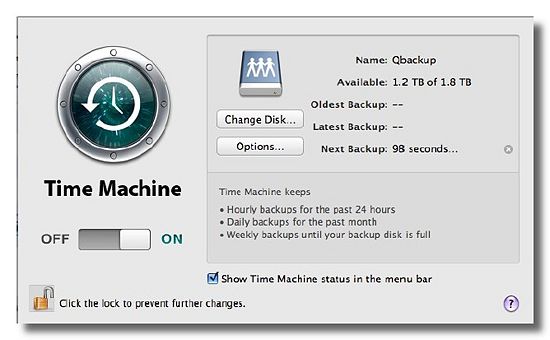
7. Open the System Preferences application again and enable TimeMachine and click on change disk select Qbackup.
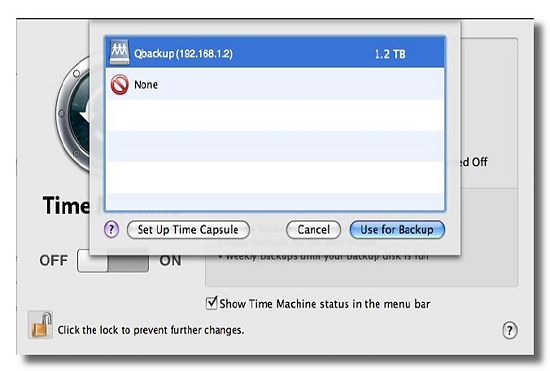
While your are waiting for the first backup, do the following: (if you have spotlight running)
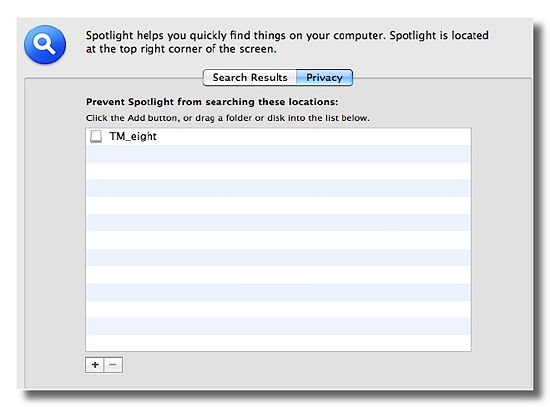
8.Prevent spotlight from indexing the "TM_eight" share (this would slowdown the backup considerably). While the share is still mounted goto Spotlight's privacy panel and add (+)“TM_eight” like this:
9. Sit back relax while the first backup is made (depending on the size of the data this could take several hours)
10. After the first backup you may eject the "TM_eight" share. *!!! Time Machine will automatically mount the sparsebundle file directly (during backups you'll see “TM_eight”mounted)
Restore in case of total disk failure (you should test this)
1. Boot from the installer DVD. Choose “Options…” to get the Utilities menu
2. Utilities > Disk Utility to partition the disk the way you like it
3. Utilities > Restore System from Backup… If your Time Machine backup set appears, then restore away. While there’s a button here to connect to a remote disk, that option wasn’t clickable for me. So we’ll have to mount our network volume manually.
4. Utilities > Terminal Run this command to mount your backup volume manually (substitute your username, password, and so forth):
$ mkdir /Volumes/Qbackup
$ mount -t afp afp://username:password@hostname/Qbackup /Volumes/Qbackup
$ exit
5. Utilities > Restore System from Backup… and you should now be able to choose your Time Machine backups.
- Note:
On the QNAP you should have the following permissions:
[/share/Qbackup] # ls -al
drwxrwxrwx 14 sodium everyone 4096 Apr 25 12:37 ./
drwxrwxrwx 17 admin administ 4096 Apr 25 09:03 ../
drwxr-xr-x 2 sodium everyone 4096 Apr 25 12:32 .AppleDB/
drwxrwxrwx 2 sodium everyone 4096 Apr 25 12:32 .AppleDesktop/
drwxrwxrwx 2 sodium everyone 4096 Apr 25 12:36 .AppleDouble/
-rw-rw-rw- 1 sodium everyone 16 Apr 25 12:34 :2e002332123456
-rw-rw-rw- 1 sodium everyone 6148 Apr 25 12:32 :2eDS_Store
drwxrwsrwx 4 sodium everyone 4096 Apr 25 12:36 eight_002332123456.sparsebundle