TS-101 Q-RAID1 Disaster Recovery Test Report
Summary
QNAP TS-101 offers unique Q-RAID 1 mirroring disk management function for backup of TS-101 data via eSATA or USB port to an external disk. When the internal disk is damaged, the data can be recovered immediately.
This test will demonstrate how Q-RAID 1 mirroring backup function and data recovery can be easily done in a few steps. First, data is backed up from TS-101 to an external SATA disk via the eSATA port. Then verify when TS-101 internal disk fails or data is missing, the data can be accessed by installing the external SATA disk directly to TS-101 or by installing a new disk in TS-101 and restoring the data from external Q-RAID 1 backup disk. <Complete Report>
Outline
Step 1. Mirror Station
Install one hard disk (HDD 1) in TS-101 and externally plug in another SATA hard disk (HDD 2) to execute Q-RAID 1 backup for TS-101.
Step 2. Disaster Recovery A
Replace HDD 1 with HDD 2. Test if the backup data is readable and consistent.
Step 3. Disaster Recovery B
Replace HDD 2 installed in TS-101 with another new disk (HDD 3). Plug in HDD 2 externally, and test if the backup data can be copied from HDD 2 to HDD 4.
Practical Operating Procedure
Step 1. Mirror Station
Install one hard disk (HDD 1) into TS-101 and externally plug in another SATA hard disk (HDD 2) to execute Q-RAID 1 backup for TS-101.
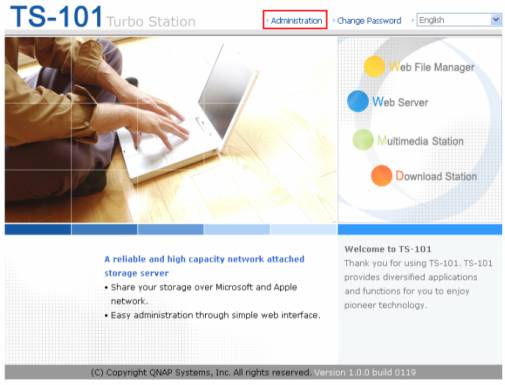
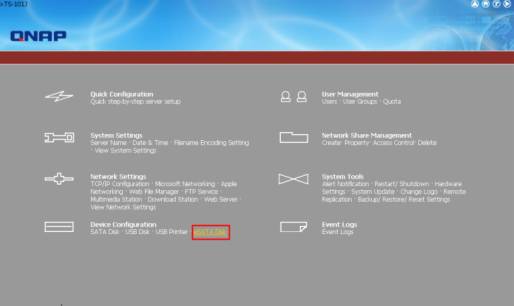
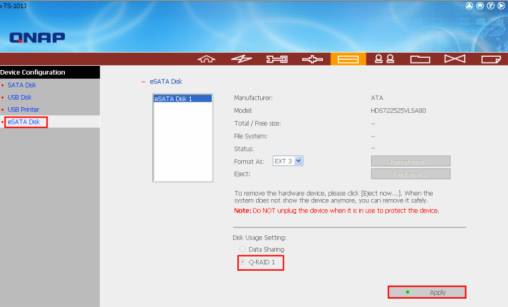
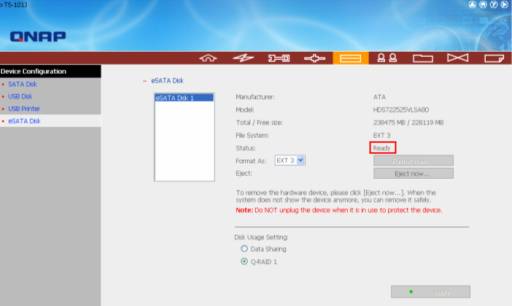
- Enter the TS-101 administration page, click "Administration". Login TS-101 and then go to "e-SATA Disk" of "Device Configuration"
- Select "Q-RAID 1" under Disk Usage Setting. Click "Apply" to execute Q-RAID 1 formatting and synchronization.
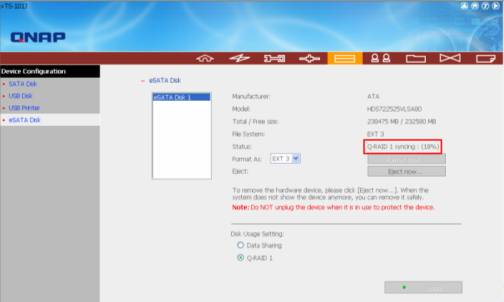
- When the recovering task finishes, the status of e-SATA Disk will become "Ready", which means the mirror station (Q-RAID 1) has been set up successfully.


Step 2. Disaster Recovery A
Replace HDD 1 with HDD 2. Test if the backup data is readable and consistent.
- First, check the data in HDD 1.

- After turning off TS-101, take out HDD 1 and install HDD 2 in TS-101.
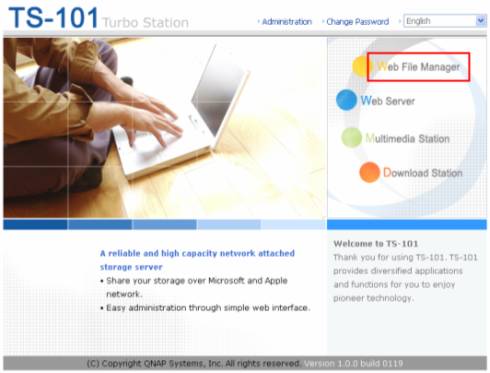
- Turn on TS-101. Go to the administration page and login Web File Manager.
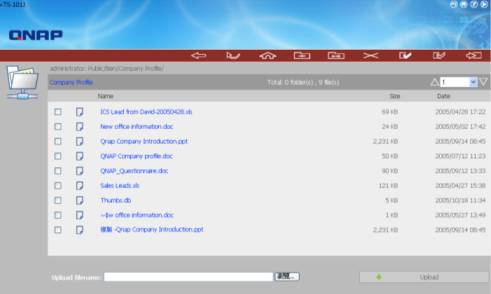
- Check if the data in HDD 2 is consistent with HDD 1. If yes, it means the function of Mirror Station (Q-RAID 1) does work.


Step 3. Disaster Recovery B
Replace HDD 2 installed in TS-101 with another new hard disk (HDD 3). Plug in HDD 2 externally, and test if the backup data can be copied from external HDD 2 to HDD 3.
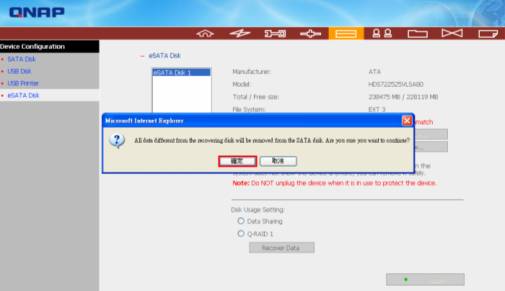
- Enter the TS-101 administration page. Go to "e-SATA Disk" of "Device Configuration". Image:TS-101_QRAID1_9.jpg
- Click "Recover Data".
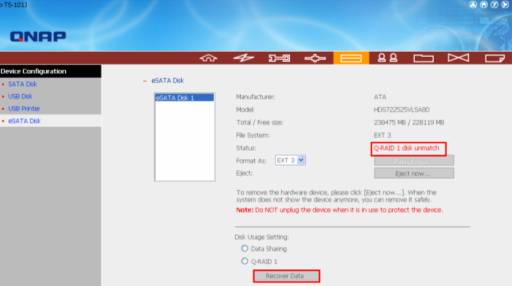
- Click "OK" to continue. Q-RAID1 will start to recover the data.
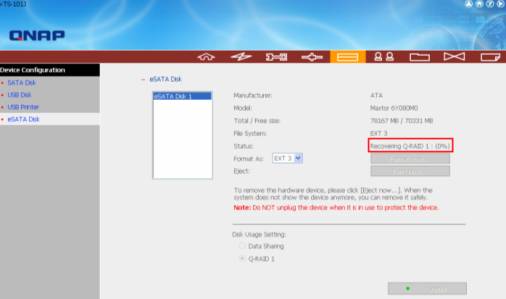
- When the recovering task finishes, the status of e-SATA Disk will become "Ready".
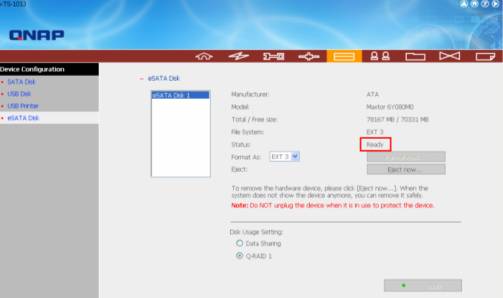
- Follow the procedure of checking data in Step 2, go to "Web File Manager" of TS-101. You will find the data has been recovered completely.


