Static Volume Recovery
Jump to navigation
Jump to search
Recovery Tool for Single / RAID 1 static volume
Recovery Tool for Single / RAID 1 static volume
Please use this guide if you need to read the data of a Single Disk or RAID 1 static volume in a PC.
This guide is only intended for recovery of the data in case of the NAS being non-operational.
IMPORTANT NOTICES
- This tool is for recovering data from a Single or RAID1 static volume when the NAS unit is non-operational
- This tool will mount the data in READ-ONLY mode, to prevent accidental data corruption
- This tool is used entirely at your own risk and QNAP does not take responsibilty for any adverse consequences of using this tool
- Legacy volume or Storage Pool cannot be recovered with this tool
• For Legacy volume (Single or RAID1) you can use EXT driver for Windows to read data directly in a PC: http://www.pendrivelinux.com/access-ext2-and-ext3-from-windows/
• For Storage Pool, you must recover the volume in a QNAP NAS. - This tool will not recover from faulty RAID array, filesystem errors, or deleted files
Requirements for recovery
- A Windows PC
- HDD from a QNAP NAS which contained Single or RAID1 static volume
- External USB HDD enclosure (installed with the HDD from a QNAP NAS)
- The network should have a DHCP server (most home routers have this built-in, if you don't know what this is don't worry about it)
Steps to recover
- Download and install VMWare Player: http://www.vmware.com/products/player
- Download the recover tool: http://download.qnap.com/Storage/tsd/utility/core.zip
- Unzip the core.zip file

- Connect the USB HDD enclosure to the PC
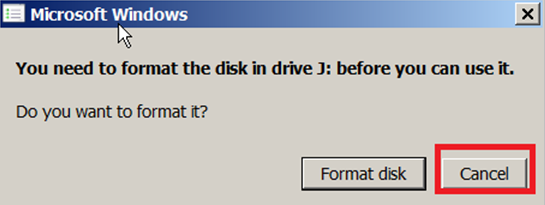
Important!: If Windows asks to format/initialise the disk, select Cancel/NO
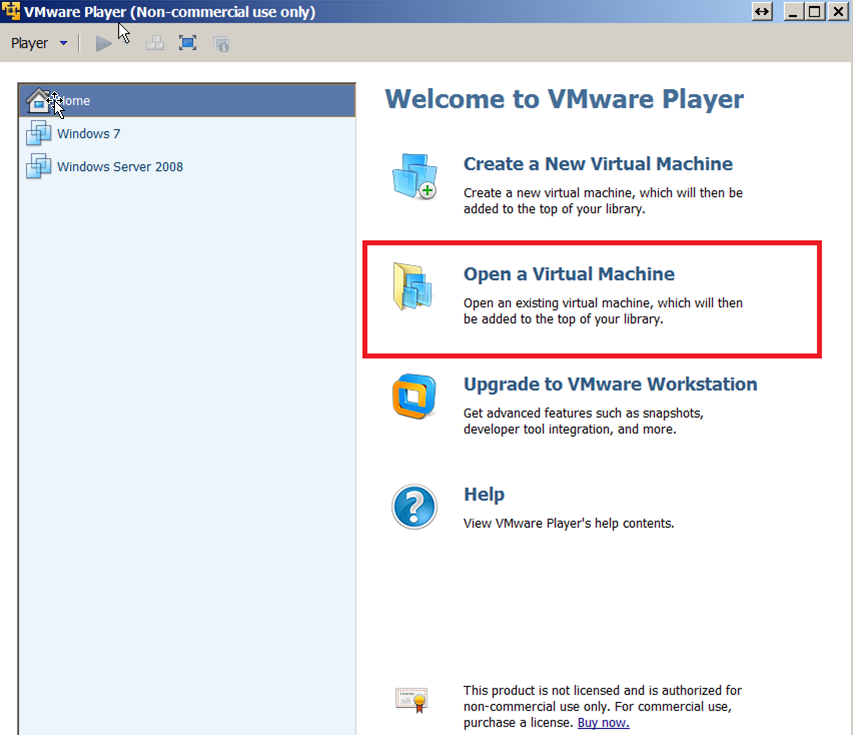
- Open the VMware Player application which was installed in Step 1
- Click "Open a Virtual Machine"
- Browse to the unzip location of Step 3 and select the "core.vmx" file
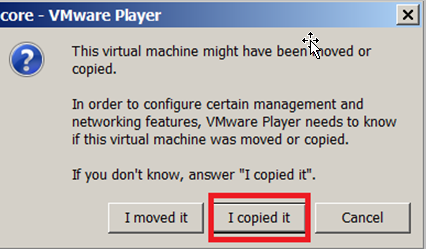
- Click "Play virtual machine"
Note: If a prompt about virtual machine being moved or copied will appear, click "I copied it"
Note: If a prompt about VMware Tools appears, click "Remind Me Later"

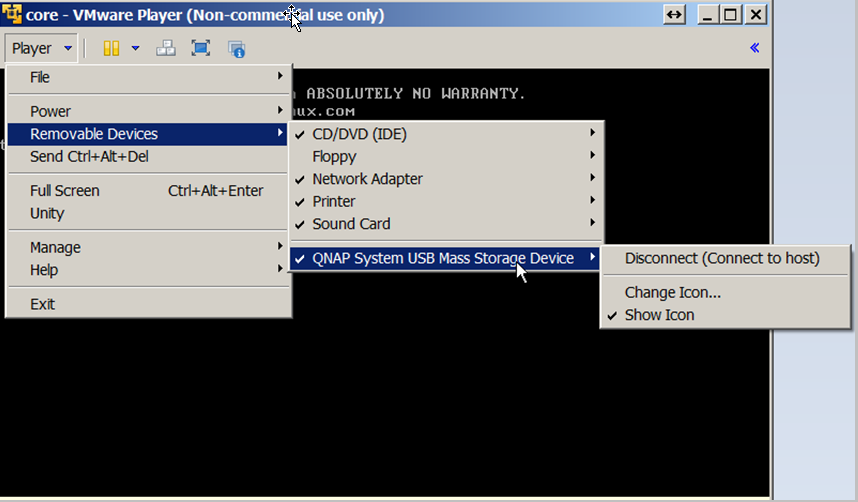
- In the VMware Player menu bar, click Player > Removable Devices > USB Device > Connect to connect the USB HDD enclosure to the Virtual Machine
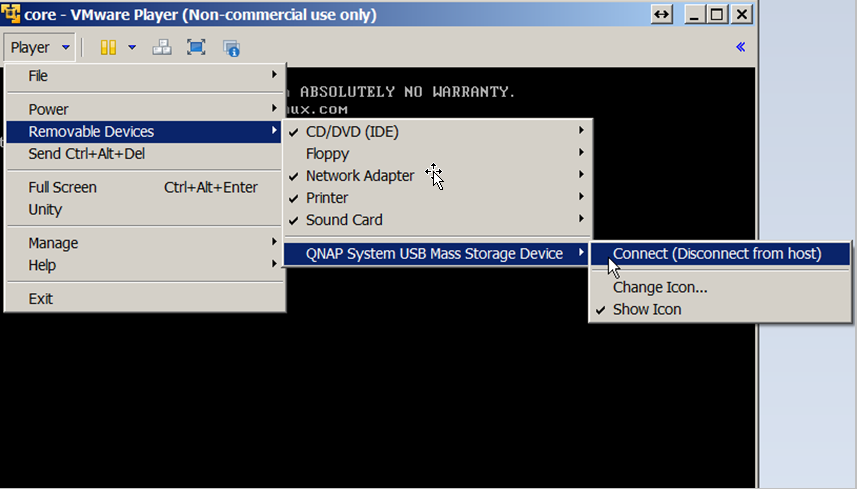
Click OK, to confirm unplug from physical host and plugin to virtual machine
File:Vm usbnote.png
Note: If you only see a "Disconnect" button, it means the USB device is already connected to the Virtual Machine
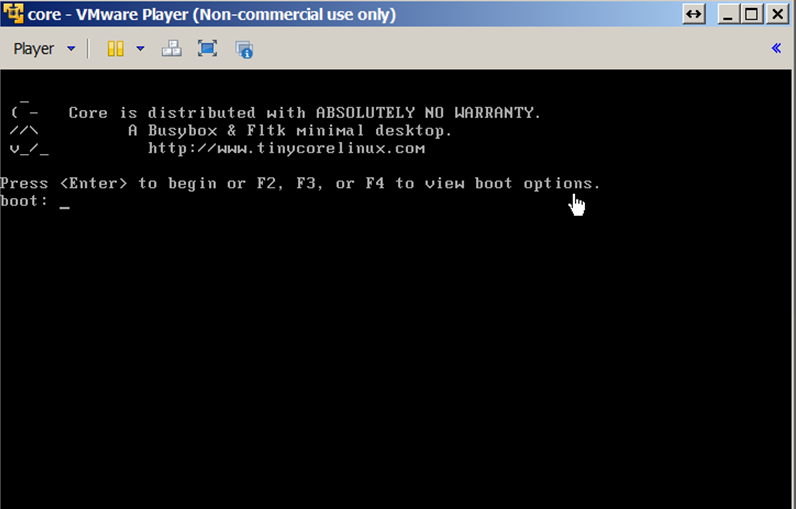
- Press <Enter> at the boot screen
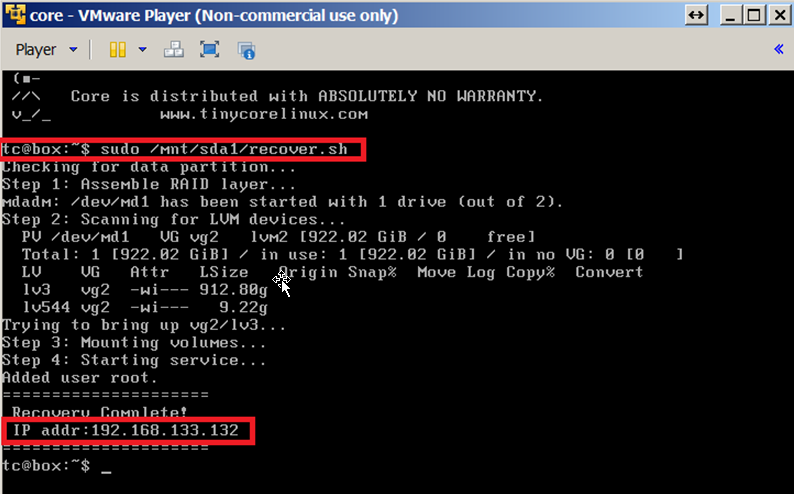
- After you see a prompt "tc@box:~$", type the below command to run the recover script:
sudo /mnt/sda1/recover.sh - If the script is successful, it will display an IP address
- From the Windows PC, open Windows Explorer and type \\ip-address in the address bar, where "ip-address" is the address displayed in the previous step
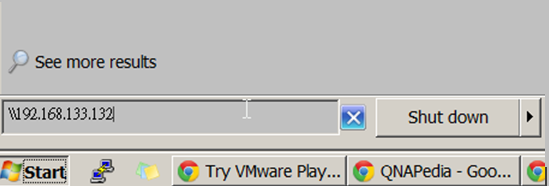
- You will see a folder "data" which contains the recovered data volume


Note:
- If necessary to reset the VM, type the below command:
sudo reboot